This time of the year I usually have a little time to go through the notes I made over the course of the last 12 month. Most of them are some howtos and write-ups of some of the things I learned or recipes I’d like to use again in the future. One of those write-ups cover some of the steps I undertake to setup a new box running Mac OS. This usually happens once or twice a year and I often forget some things that distract me on a later occasion. I think those notes could be useful to someone else as well so I’ll share them here.
Content
A word of caution: The list is deliberately not extensive but is intended as a minimal setup that should get the average developer a long way on OS X. It’s also not meant to provide an automatic way to prepare the system. I rather use it as a reminder and to copy/paste some of the more verbose commands like the brew setup stuff. All programs listed should be free or at least provide a free version.
Command Line first
I’m not a fan of fancy Gui tools and always prefer issuing some commands on a descent shell over clicking some buttons. So this setup will be mainly concerned with command line tools.
Terminal
Let’s kick of with the tool every programmer needs every day: a descent terminal app. The terminal
app that comes with OS X does the job but once you’ve tried iTerm 2 there is
no going back again. It packs a lot of useful features into the bag like split panes, a very nice
search and triggers that can react to arbitrary output.
Once the terminal is covered everything else can be attacked.
brew and brew-cask
brew is a very convenient way to install command line tools and since some time you can use brew-cask to install OS X applications. Astonishing how much more convenient it is to install applications that way!
First install brew:
ruby -e "$(curl -fsSL https://raw.githubusercontent.com/Homebrew/install/master/install)"
Then brew-cask:
brew install caskroom/cask/brew-cask
When using brew cask install I like to add the --appdir=/Application option which will create a
symlink to the newly installed app in the global application directory.
Some basic system tools
Dropbox
Almost ridiculous how useful this app can be. Installable with brew-cask:
brew cask install --appdir="/Applications" dropbox
Dropbox helps me to make most of my profiles and projects available on every machine I work on. And since I mainly have text files in my dropbox, the free account is all I need. It’s a great way to share configuration-settings.
if [ -f ~/.bashrc_common ]; then
   . ~/.bashrc_common
fi
My .bashrc for instance is split into a part that is portable
across Mac and Linux systems (.bashrc_common) so that one is symlinked into my dropbox folder and
included in the .bashrc files of every machine.
~ > .bashrc_common -> Dropbox/dotfiles/.bashrc_common
Quicksilver
An application launcher is essential, Quicksilver has been a worthy companion for many years. Alfred seems to be more fashionable these days but so far I never tried it.
brew cask install --appdir="/Applications" quicksilver
Asepsis
Ever wondered if there is a way to get rid of those stupid .DS_Store files Mac OS creates
automatically? Those files are meant to serve as a general-purpose store for metadata, mostly used
by Apple’s Finder. The are hidden by default, but developers notice them of course. And they can
really be a problem when working with network drives.

A rather smart solution to deal with them is implemented with Asepsis. It migrates all .DS_Store
files to a separate folder (/usr/local/.dscage/) and keeps your folders clear of them.
~ > brew cask install --appdir="/Applications" Asepsis
~ > asepsisctl diagnose
Your Asepsis installation seems to be OK
~ > asepsisctl migratein
migrating all .DS_Store files from /Users/muellero into /usr/local/.dscage
................................................................................................................................................................................................................
moved 208 .DS_Store file(s) into the prefix folder
The holy cow - The Text Editor
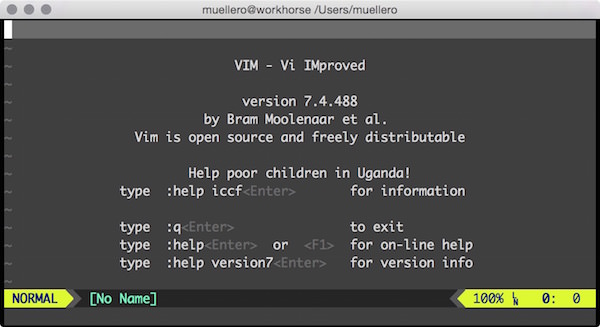
You probably will spend a lot of time using it, so better find a good fit for yourself. I’m a Vim-person, so that is what I install. And since some of the plugins I use need lua support, I enable this for the build.
brew install vim --with-luajit
I won’t get into vim configuations, that is too individual. But keeping your editors configuration in an easily accessible place is always a good thing (I keep my vim configuration on github so I just need to clone my repository and install my plugins with my plugin manager).
If vim is not your thing, emacs and Sublime Text both are available on brew-cask.
Essential command line utilities
All of the following utilities are best installed with brew install.
git – best version control system I’ve worked with
astyle – Artistic Style, can format source code with a lot of options
cmake – often needed to build C/C++ libraries and projects
colordiff – just a wrapper for diff but does some nice highlighting
ctags – Exuberant ctags, indispensable for vim and emacs users
htop-osx – A port of htop to OSX
luajit – a Just-In-Time Compiler for Lua
luarocks – a deployment and management system for Lua modules
mercurial – another distributed VCS
node – the NodeJS framework
p7zip – compression utility with very good compression ratio
picocom – minimal terminal emulator
the_silver_searcher – ag is a grep replacement similar to ack, very fast
tig – text mode interface for git
tree – quickly view a directory’s content
unrar – unpack rar files
watch – periodically execute command
wget – download files over HTTP/HTTPS/FTP
z – easily jump around between directory locations
fzf – general-purpose fuzzy finder for your shell
tmux – terminal multiplexer
All of the utilities from above can be installed with a single command.
utilities=( git astyle cmake colordiff ctags htop luajit luarocks mercurial \
node p7zip picocom the_silver_searcher tig tree unrar watch wget z fzf tmux )
brew install ${utilities[@]}
brew cleanup
Useful Apps
All of the following apps can be installed with brew cask install --appdir="/Applications".
wireshark – great tool to trace and analyze network traffic
hex-fiend – very fast hex editor
google-chrome – has the best web development tools I know
qlcolorcode – QuickLook plugin for source code with syntax highlighting
qlmarkdown Quicklook plugin to preview markdown files.
qlstephen QuickLook plugin for plain text files without a file extension
quicklook-json QuickLook plugin for json highlighting
Asepsis – prevents creation of .DS_Store files. It redirects their creation into a special folder
boot2docker – allows you to run docker (virtual environment) containers on OS X
vagrant – virtual machine manager
virtualbox – free, cross-platform consumer virtualization product supported by vagrant
omnidisksweeper – shows the files on your drive (in descending order by size)
vlc – plays every video format
Everything can be installed with a single command:
apps=( wireshark hex-fiend google-chrome qlcolorcode qlmarkdown qlstephen \
quicklook-json Asepsis boot2docker virtualbox omnidisksweeper vlc )
brew cask install ${apps[@]}
brew cask cleanup
Ruby
Probably not for everyone but ruby is such an integral part of a lot of development tools it’s hard to ignore it even if you are not a ruby developer.
Manage ruby version with rbenv
rbenv is a convenient way to switch between different ruby installations. On purpose it does a
whole lot less than rvm but comes with a much lower impact for your system. Using
it together with bundler is currently the way I set up my ruby environment.
brew install rbenv ruby-build
Don’t forget to add the line eval "$(rbenv init -)" to your profile to enable rbenv.
This installs a ruby and sets it as the global default ruby version:
rbenv install 2.2.0
rbenv rehash
rbenv global 2.2.0
.gemrc
Speed up gem installations by skipping documentation.
tmp > echo 'gem: --no-rdoc --no-ri' >> ~/.gemrc
.irbrc
Influences how irb, the Interactive Ruby Shell, behaves. I really like to have the autocompletion of bond in irb. Also nice: the ability to drop into vim to do edits in the editor (Interactive editor).
require 'rubygems'
require 'interactive_editor'
require 'bond'
Bond.start
The other dotfiles
Besides the usual .profile or .bash* files there are a couple of other interesting ones that I
like to have setup. I keep most of them in my dropbox folder and just symlink them.
.vimrc
The only one not in my dropbox. I check out my vim config into a separate folder (.vim) and source a platform independent and a platform specific part.
source ~/.vim/_vimrc_universal
source ~/.vim/_vimrc_mac
.git-completion
I just take the version from git’s git,
copy it to home under the name ~/.git-completion.sh and add source ~/.git-completion.sh to my .bashrc.
.gitconfig
Most of the options I use globally:
git config --global push.default current
git config --global core.excludesfile ~/.gitignore
git config --global user.name "myname"
git config --global user.email [email protected]
git config --global color.branch auto
git config --global color.diff auto
git config --global color.interactive auto
git config --global color.status auto
git config --global core.editor "vim"
git config --global alias.st status
git config --global alias.ci commit
git config --global alias.co checkout
git config --global alias.br branch
git config --global alias.lg "log --graph --pretty=format:'%Cred%h%Creset -%C(yellow)%d%Creset %s %Cgreen(%cr) %C(bold blue)<%an>%Creset' --abbrev-commit --date=relative"
.editrc
Defines various settings to be used by the editline library. This one binds all keys to the standard vi-like bindings:
bind -v.inputrc
The readline init file. Since a lot of tools use the readline library, these settings can affect a whole range of applications.
# enable vi-mode
set editing-mode vi
set keymap vi
# Turn on case insensitivity for tab-completion
set completion-ignore-case on
.tmux.conf
Very individual again. Here is mine:
unbind C-b
set -g prefix C-a
bind -n M-Left select-pane -L
bind -n M-Right select-pane -R
bind -n M-Up select-pane -U
bind -n M-Down select-pane -D
setw -g mode-mouse on
set -g terminal-overrides 'xterm*:smcup@:rmcup@'
setw -g mode-mouse on
setw -g mode-keys vi
set -g default-terminal "xterm"
set -g prefix C-a
bind-key -r C-h select-window -t :-
bind-key -r C-l select-window -t :+
bind-key J resize-pane -D
bind-key K resize-pane -U
bind-key H resize-pane -L
bind-key L resize-pane -R
# quick pane cycling
unbind ^a
bind ^a select-pane -t :.+
bind C-p run "tmux set-buffer \"$(xclip -o)\"; tmux paste-buffer"
bind C-y run "tmux show-buffer | xclip -selection clipboard"
bind -n C-k clear-history
# pane movement
bind-key j command-prompt -p "join pane from:"  "join-pane -s '%%'"
Ready to start
Once your machine has this kind of basic setup, most of the fundamental stuff should be out of the way. And adding additional tools and configurations that are more specific will be a lot quicker. Happy hacking .
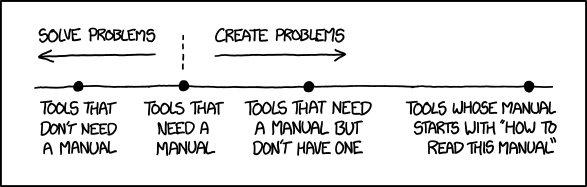
xkcd-image: http://xkcd.com/1343/